Setting up a touchscreen for your Raspberry Pi is easier than you think and opens up endless possibilities for your projects! In this guide, we will walk you through the connection and configuration of the Raspberry Pi 7″ Touchscreen Display step by step. You could be building a smart home control panel or creating a portable device. Whatever the case, this tutorial will get your touchscreen up and running in no time. Let’s get started!
Components Required
| Component | Quantity |
| Raspberry Pi 3 or above with Raspbian OS | 1 |
| Raspberry Pi 7″ Touchscreen Display | 1 |
| DSI Ribbon Cable | 1 |
| Jumper Wires | 4 |
| Screws (to mount Pi board to adapter) | 4 |
| Touchscreen Display Enclosure | 1 |
Step 1: Set Up the Touchscreen
Flip over the screen, and you’ll notice the adapter board already attached to the back of the screen.
Carefully open the ribbon housing by sliding out the black brackets on both sides at the same time—fingernails might help with this.
Insert the DSI ribbon cable with the blue side facing down.
Step 2: Connecting Jumper Wires
The kit contains 4 jumper wires. Insert these within the right pins on the adapter board.
You may use any color of your choice for the wires, but just remember the color matches the correct pin on the Raspberry Pi board in the next steps.
- GND (Black)
- 5V (Red)
- SCL (Yellow)
- SDA (Green)
Step 3: Install a Keyboard to Your Pi
- Connect a physical keyboard to the Raspberry Pi (or SSH into it if that’s your thing.) and Connect to the internet via WiFi or Ethernet.
- Open the terminal.
- Type sudo apt-get install matchbox-keyboard.
- Let the program download & install (it takes 30s-1min depending on your connection.)
- Exit the terminal & reboot your Pi.
- The keyboard can be found by clicking the Menu -> Accessories -> Keyboard.
Before you connect the Pi to the WiFi adapter board, however, you need to configure it for touchscreen mode.
Connect your Pi to a keyboard and monitor. Open Terminal and type the following commands:
sudo apt-get install matchbox-keyboard
Then reboot the Pi with:
sudo shutdown -r now
After reboot, it will appear at Menu -> Accessories -> Keyboard.
If you still can’t find it or wish to create a desktop shortcut follow these instructions:
- Open Terminal
cd Desktop
nano keyboard.sh
2. Add the following to the file that opens in GNU Nano:
!/bin/bash
matchbox-keyboard
3. Save and make it executable with:
chmod +x keyboard.sh
Step 4: Adjust Screen for Rotation
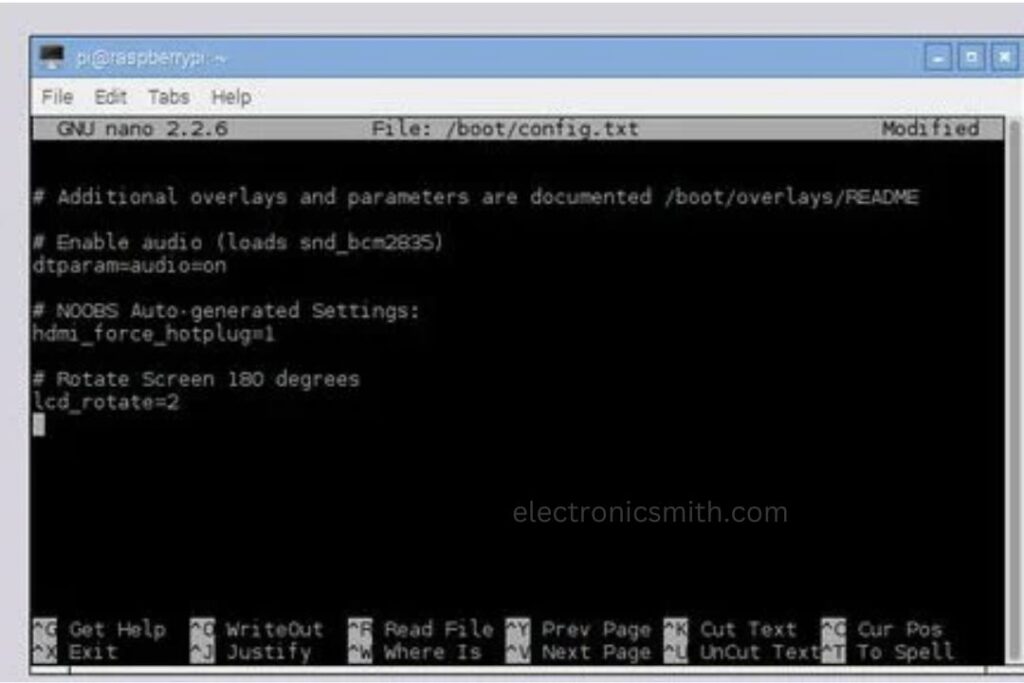
When first testing the touchscreen, it might appear upside down in the display case.
To flip the screen, open Terminal and type
sudo nano /boot/config.txt
Add this line to the file:
lcd_rotate=2
Exit and save the file:
- Press Ctrl + X
- Press Y to confirm changes
- Hit Enter
Shut down the Pi and disconnect all plug-ins.
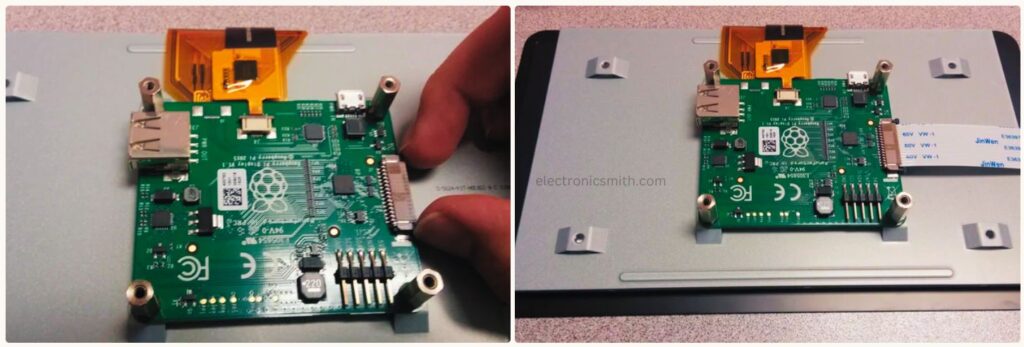
Step 5: Attach Pi to the Adapter Board
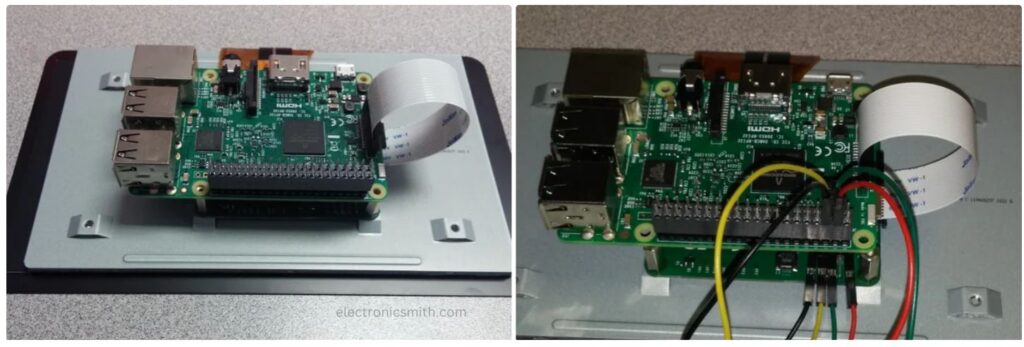
Now is the time to attach the Pi.
- Align the Pi with the ribbon ports stacked on the same side.
- Use the 4 included screws to secure the boards together.
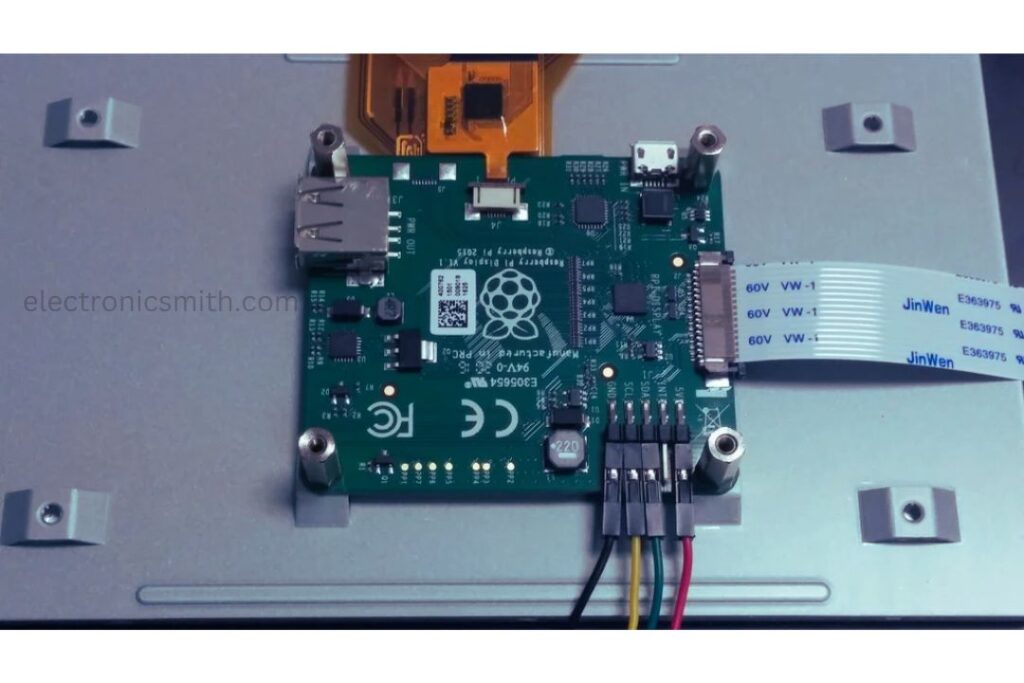
- Slide the ribbon brackets upward on the Pi to open the housing.
- Insert the ribbon cable and slide the brackets back down to tighten.
- Connect the wires to the Pi board:
- GND (Black): Third pin down from the right.
- 5V (Red): Second pin down from the right.
- SCL (Yellow): Third pin down from the left.
- SDA (Green): Second pin down from the left.
Step 6: Assemble Enclosure
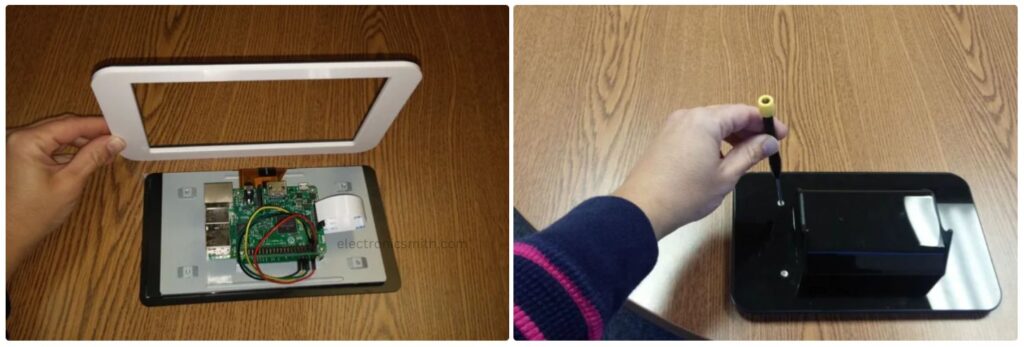
- Position the white frame upside down on the back of the screen.
- Position the back of the enclosure so that it covers the openings of the Pi board.
- Attach the enclosure with the 4 screws provided.
Step 7: Power On!
Connect the mini USB to a power source or an external battery pack and now it is ready for use