Oxygen sensors are important for saving lives by tracking air quality in hospitals, homes, mines, industries, and laboratories. The convenient sensors also find applications in smart home projects, IoT devices, and so on, and assist in avoiding suffocation hazards in low-airflow areas. In this tutorial, we will explore the DFRobot oxygen sensor, including its features, connections, and uses, and offer example codes and diagrams to assist you in starting your Arduino project.
Materials Required
| Component | Quantity |
| Arduino Uno Rev3 | 1 |
| Gravity I2C Oxygen Sensor | 1 |
| Dupont Wires | 1 set |
| Arduino USB Cable | 1 |
| Computer with Arduino IDE | 1 |
Basics of the Oxygen Sensor by DFRobot
This section explains the basics of the Oxygen sensor SEN0322 by DFRobot. The SEN0322 sensor is accurate and easy-to-use, making it ideal for air quality monitoring in mines, industries, etc. Its reliability and stability are key features. You’ll learn about the features, connections, pin descriptions, and applications of this oxygen sensor. This sensor supports I2C protocol, and can operate with 3.3V or 5V systems; this makes it to be supported with boards like Arduino Uno, Mini, Mega, and Raspberry Pi.
Features of the DFRobot Oxygen Sensor
- Quick and easy calibration
- High sensitivity
- Serial I2C interface
- Supports 3.3V and 5V Arduino boards
- Reverse polarity protection
- Longer sensor life
Specifications of the DFRobot Oxygen Sensor
| Parameter | Value |
| Operating Voltage Range | 3.3V to 5V |
| Communication Interface | I2C |
| Sensor Lifetime | 2 years |
| Operating Temperature | -20°C to 50°C |
| Operating Humidity | 0 to 99 %RH |
| Measurement Range | 0 to 25 %vol |
| Maximum Measurement Limit | 30 %vol |
| Stability | < 2% |
| Response Time | < 15 sec |
| Resolution | 0.15 %vol |
How to Calibrate the Arduino Oxygen Sensor?
Calibration of the oxygen sensor is easy:
- Power on the oxygen sensor.
- Put the sensor outside.
- Watch for sensor data until it settles.
- Press and hold the calibration button for 2+ seconds. Calibration complete!
Step-by-Step Directions to Install the Oxygen Sensor
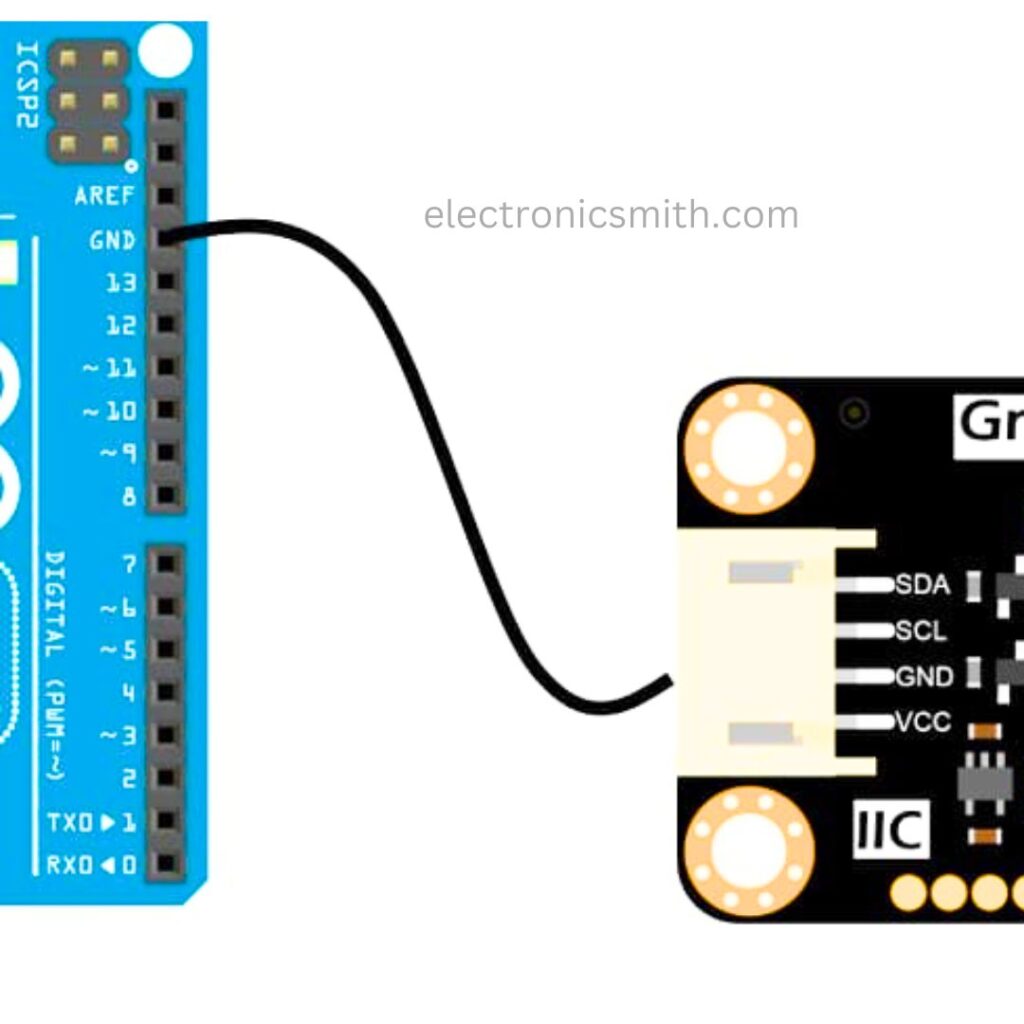
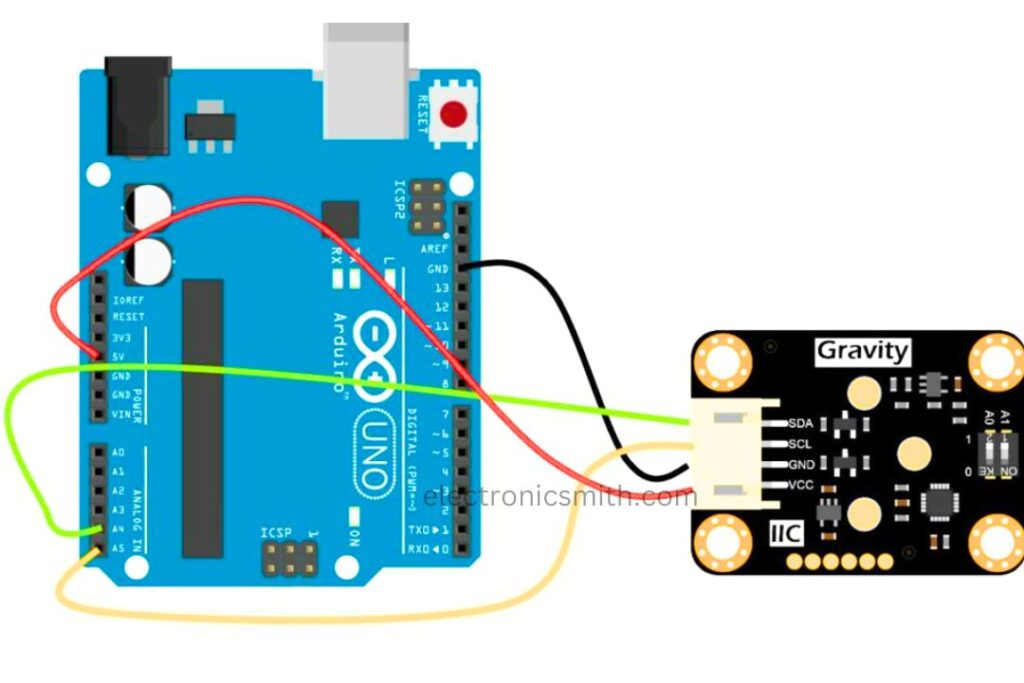
Step 1: Ground Connections
Wire the GND pin of the sensor module to Arduino GND.
Step 2: Connect I2C SCL Line
Connect the A5 pin of the Arduino Uno to the SCL pin of the sensor module.
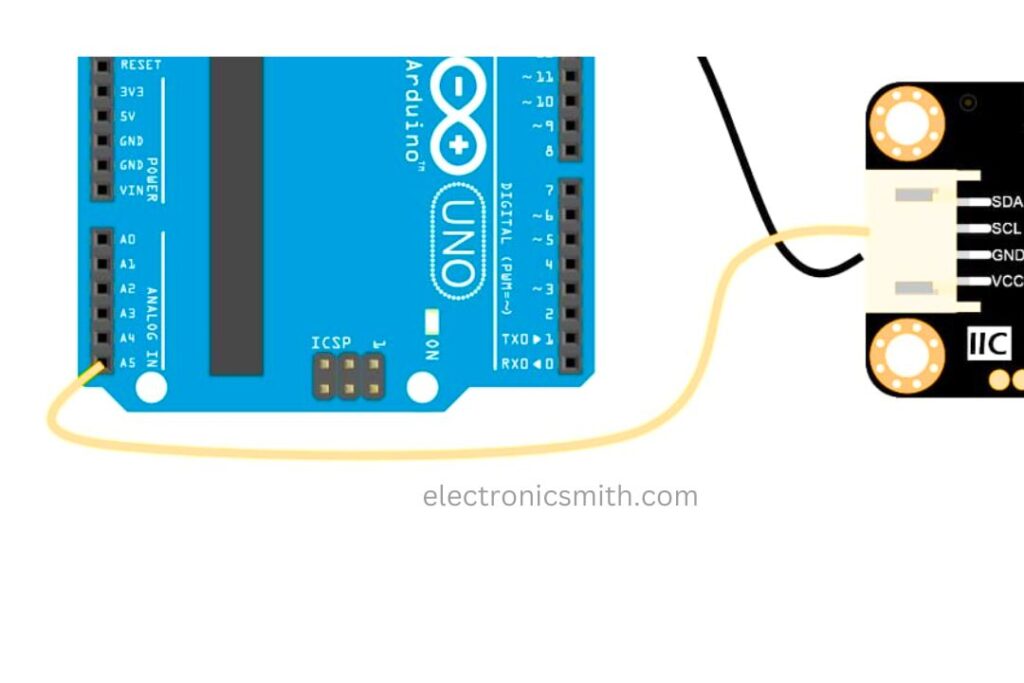
Step 3: Connect I2C SDA Line
Connect the A4 pin of the Arduino Uno to the SDA pin of the sensor.
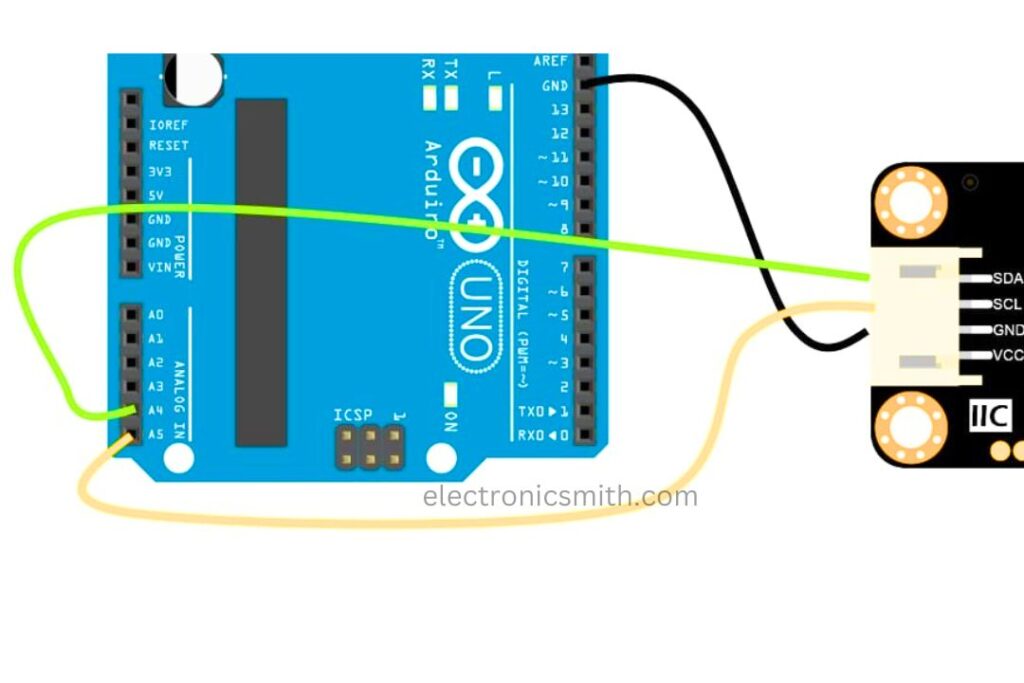
Step 4: Join Power Line
Connect the 5V line of Arduino to the VCC pin of the sensor.

Step 5: Final Connection
Ensure all connections are secured and verified.
Arduino Code Example for Oxygen Sensor
The default I2C address is 0x73. Update the code if the hardware address is modified.
#include "DFRobot_OxygenSensor.h"

#define COLLECT_NUMBER 10
#define Oxygen_IICAddress ADDRESS_3

DFRobot_OxygenSensor Oxygen;

void setup() {
  Serial.begin(9600);
  while (!Oxygen.begin(Oxygen_IICAddress)) {
    Serial.println("I2c device number error !");
    delay(1000);
  }
  Serial.println("I2c connect success !");
}

void loop() {
  float oxygenData = Oxygen.ReadOxygenData(COLLECT_NUMBER);
  Serial.print("Oxygen concentration is ");
  Serial.print(oxygenData);
  Serial.println(" %vol");
  delay(1000);
}
For Calibration
#include "DFRobot_OxygenSensor.h"

#define Oxygen_IICAddress ADDRESS_3
#define OXYGEN_CONCENTRATION 20.9
#define OXYGEN_MV 0

DFRobot_OxygenSensor oxygen;

void setup() {
  Serial.begin(9600);
  while (!oxygen.begin(Oxygen_IICAddress)) {
    Serial.println("I2c device number error !");
    delay(1000);
  }
  Serial.println("I2c connect success !");
  oxygen.calibrate(OXYGEN_CONCENTRATION, OXYGEN_MV);
}

void loop() {
  Serial.println("The oxygen sensor was calibrated successfully.");
  delay(1000);
}