
Hey! So, I just bought this super cheap IR remote and receiver kit for Arduino and honestly, it was much easier to use than I thought it would be. The thing is, the documentation for these remotes is a bit sparse, so I decided to figure it out myself and share the steps here. Hopefully, it helps you get started without too much hassle!
Materials Required:
| Items | Quantity |
| Arduino Board | 1 |
| IR Receiver Module | 1 |
| IR Remote | 1 |
| Breadboard | 1 |
| Jumper Wires | 5-10 |
| USB Cable | 1 |
| Arduino IDE Installed | 1 |
Step 1: Build the Circuit
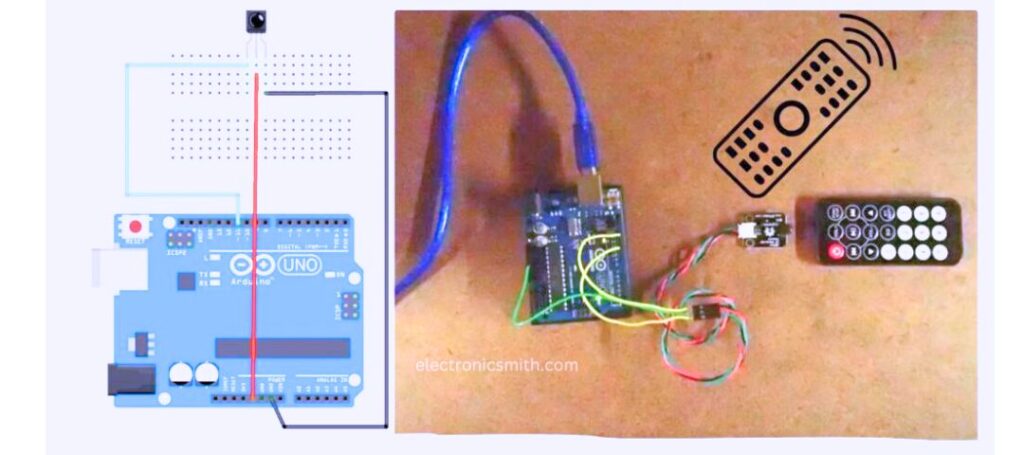
To start, you’ll need an Arduino board (I used a UNO, but other models work too). Connect the infrared receiver that comes with your kit. The receiver has three pins: PWR, GND, and SIG. Attach SIG to port 11 on the Arduino. Also, Verify the pin configuration as some sensors may have different layouts.
Step 2: Install the IR Library
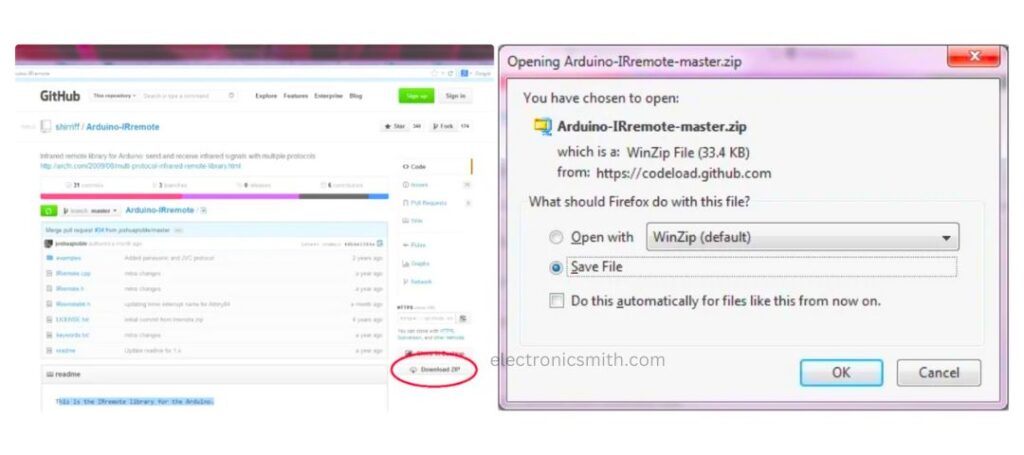
To decode the remote signals, download and install the IR library.
Paste the downloaded file into the Arduino libraries folder (e.g., C:\electronics\arduino-1.0.5\libraries). If the folder name is too long, rename it (e.g., to IR).
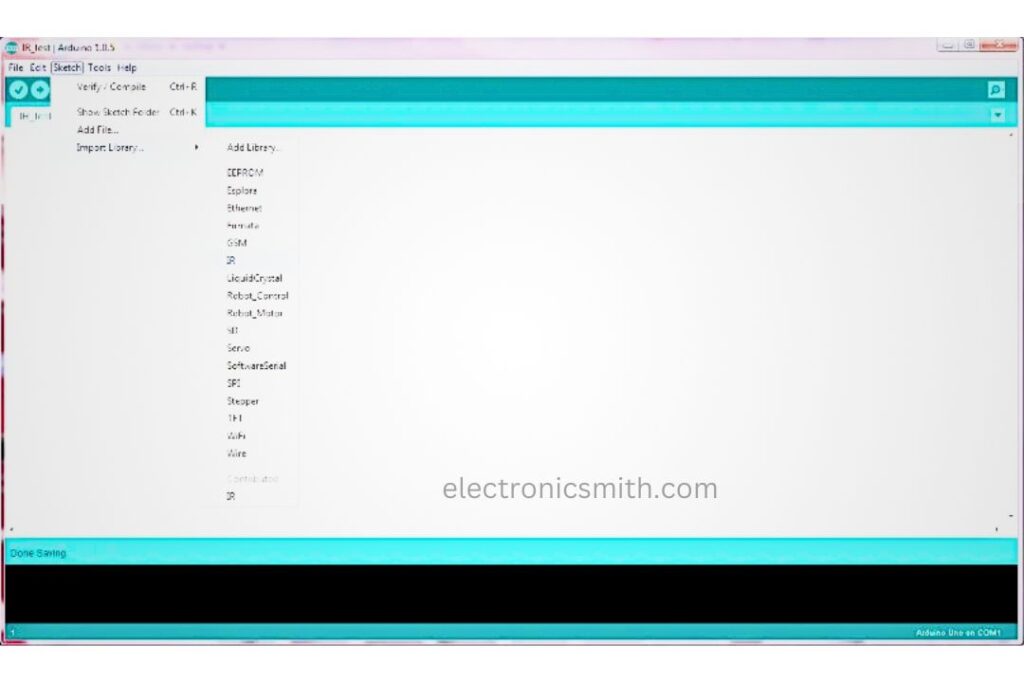
Step 3. Add the library to your sketch
With the library installed, open up a new Arduino sketch and attach the library
In the Arduino IDE menu: Sketch > Include Library > IR.
Step 4: Write and Combine the Code
Insert the given code into your sketch and then compile it to check for errors.
int RECV_PIN = 11;
IRrecv irrecv(RECV_PIN);
decode_results results;

void setup()
{
  Serial.begin(9600);
  irrecv.enableIRIn(); // Start the receiver
}

void loop()
{
  if (irrecv.decode(&results))
    {
     Serial.println(results.value, HEX);
     irrecv.resume(); // Receive the next value
    }
}
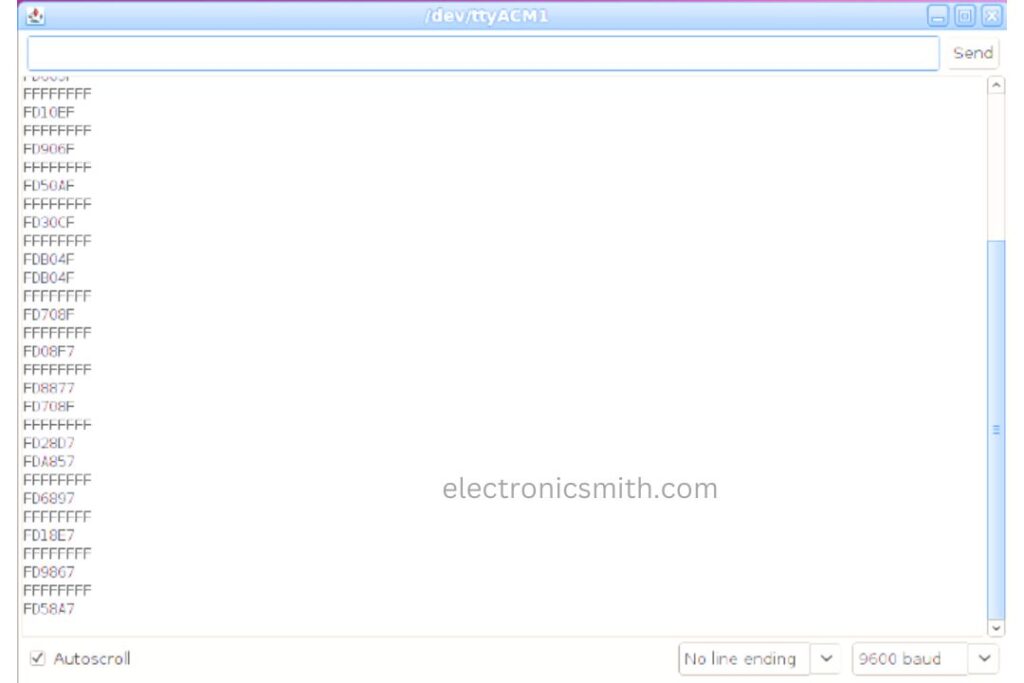
Step 5: Test using the Serial Monitor.
Connect your Arduino to the computer through USB; upload the sketch; open a Serial Monitor window in your IDE. Now simply click the button of your IR remote control – the hex numbers appear there right away.
Step 6: Code Map Remote Button
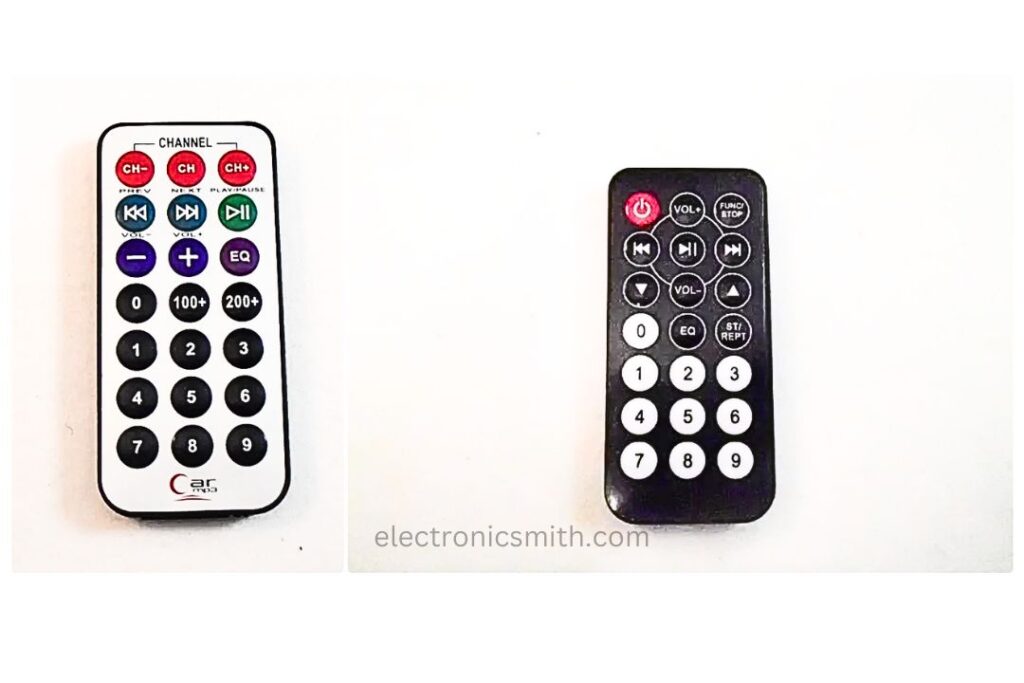
Record the hex codes for all the buttons of your remote control. I’ve listed a couple of common remotes and their codes below
White Remote:
PWR - FF629D
CH - FFE21D
|<< - FF22DD
FFE01F
Plus - FFA857
EQ - FF906F
0 - FF6897
1 - FF30CF
2 - FF18E7
3 - FF7A85
4 - FF10EF
5 - FF38C7
6 - FF5AA5
7 - FF42BD
8 - FF48B5
9 - FF52AD
100 - FF9867
200 - FFB04F
| - FFC23D
| - FF02FD
Black Remote:
PWR - FD00FF
VOL - FD807F
FUNC/STOP - FD40BF
|<< - FD20DF
| - FD609F
DOWN - FD10EF
VOL - FD906F
UP - FD50AF
0 - FD30CF
EQ - FDB04F
ST/REPT - FD708F
1 - FD08F7
2 - FD8877
3 - FD48B7
4 - FD28D7
5 - FDA857
6 - FD6897
7 - FD18E7
8 - FD9867
9 - FD58A7
Step 7: Explore Alternate Remotes
This can be tried using other remote controls, for instance, a television or a toy. The circuit will display their individual codes and therefore opens doors to a variety of Arduino projects.
1 thought on “How to Read a TV Remote with Arduino”