
Installation of Raspberry Pi Windows 10 is very simple. If you are not new, then you know about Windows 10 IoT Core. But for those who don’t know, Windows 10 is one of the most popular operating systems. More than 1 billion devices are running on Windows 10. To jump into the IoT sector, Microsoft launched a light-weighted Raspberry Pi Windows 10. Windows IoT Core is for small computers like the Raspberry Pi.
In this article, we are going to install windows on Raspberry Pi 3 and 4. The basic method is the same with a few changes. Also, we have already discuss how to install Raspbian on Raspberry Pi.
Material Required for Raspberry Pi Windows 10
Hardware
| Name | Quantity |
| Raspberry Pi 4 or Raspberry Pi 3 | 1 |
| Power adapter | 1 |
| HDMI or Mini HDMI screen According to the board, you can opt | 1 |
| Keyboard | 1 |
| Mouse | 1 |
| Memory card 16GB+ | 1 |
| SD card reader | 1 |
Software
Windows 10 image and WoR can be downloaded from the link below. Download and extract it and for your convenience keep them in one folder. This Windows 10 image support all Raspberry Pi models. Only a few steps are different, we will discuss them during installing windows. Actually, the drivers are different for different models.
| Link |
| https://www.worproject.ml/downloads |

Steps to Install Raspberry Pi in windows 10
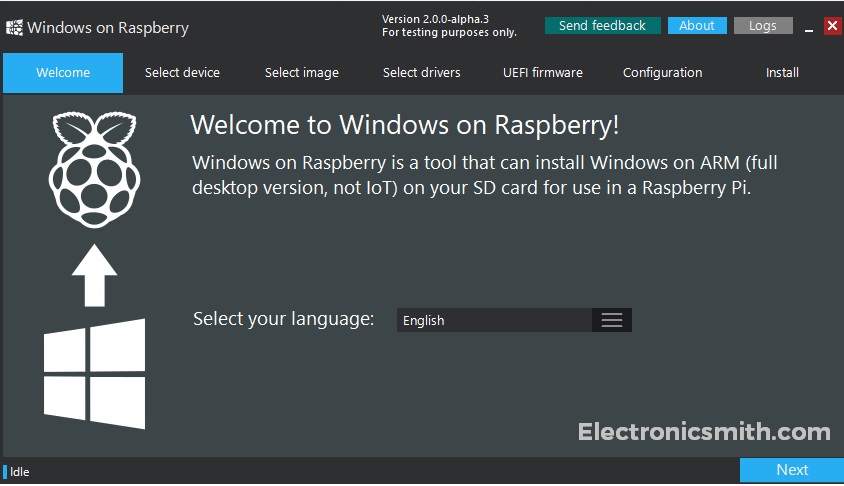
- Navigate fo folder and open WoR (windows on a raspberry pi) software (WoR_Release_2.0.0-alpha.3). Windows 10 IoT core Operating system is the same for Raspberry Pi 4, 3, and 2, with a few different steps.

- The first screen is a welcome screen from which you can choose the language. I am comfortable in English so, I choose the English language.
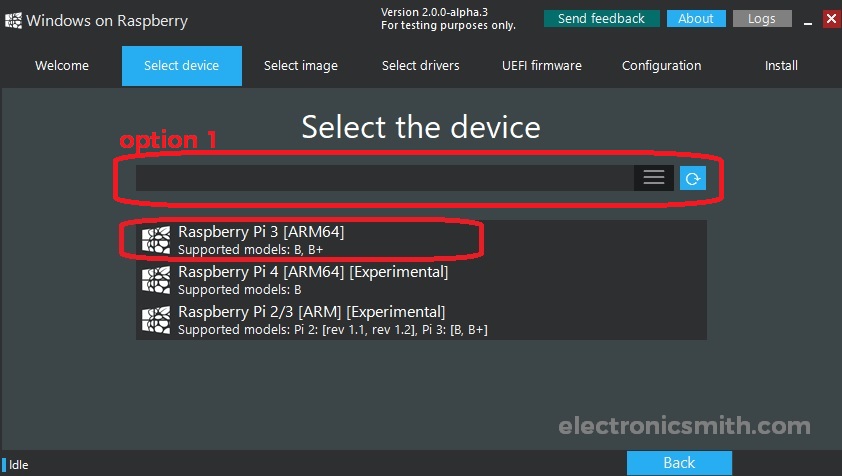
- The second option is to select the device. The first option is to select your SD card (be very careful and choose the correct drive). I am going to install Windows os on a Raspberry Pi 3. I am choosing this because this version is stable amongst all. If you want to install Windows OS for Raspberry Pi 4, then select Raspberry pi 4 [ARM64]. As it is mentioned that this version is experimental so a few services might not work.
- The third step is to select the image, navigate to the folder having .ffu file (the second file having a size of almost 4GB), and open it. The second option is for the windows edition choice (Windows 10 Professional (en-US) build 18362.86). This step is the same for all models of Raspberry Pi.

- The fourth step of Windows on the Raspberry Pi is the driver selection. The best practice is to select the latest package available on the server. If you know what you are doing, then only go for the other options. Also, this step is the same for all other models.

- The fifth step is the UEFI firmware. Select the latest firmware available on the server in the firmware source. And also, select pftf/RPi3, for Raspberry Pi 4. The option will be pftf/RPi4 by default, according to the selected model. In case, if you get something else, select the correct option accordingly.

- Accept the license agreements.

- The next option is the configuration. The option is automatically selected, so straight away press next.

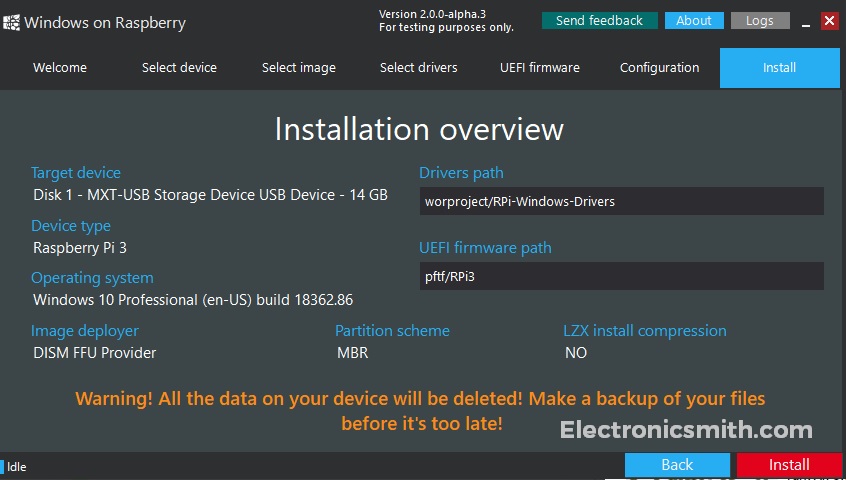
- The next option is to install and overview. Here is the last time to verify all your selected options. Make sure to target the device as your SD card. If everything is fine, click Install.
- Window installation will commence and this will take time. In my case, it took almost 20 minutes.

The Final run of Windows OS on Pi
Installation of the window is done. Now, plug your SD card on Raspberry Pi, then, connect a mouse, keyboard, or screen, and power the circuit. After a few basic configurations like language, time, etc. your Windows IoT core is ready to use.

1 thought on “Raspberry Pi Windows 10 IoT Core”