
Android is a very popular platform nowadays. There are more than two billion Android-enabled devices all over the world. Very often, the question comes to mind if we can install Android on Raspberry Pi. Yes, you heard it right, there is an Android for Raspberry Pi that is available for free. It is very popular and recommended Operating System and the installation is already discussed in the previous column. Presently, we are making Raspberry Pi Smart TV.
Material Required
Hardware
| S.no | Name | Quantity |
| 1. | Raspberry Pi | 1 |
| 2. | Adapter | 1 |
| 3. | Monitor | 1 |
| 4. | Keyboard | 1 |
| 5. | Mouse | 1 |
| 6. | Micro SD card | 1 |
| 7. | SD Card Reader | 1 |
Software
| S.no | Name | Link |
| 1. | SD Formatter | https://electronicsmith.com/wp-content/uploads/2020/03/SD-Formatter-20191104T125407Z-001.zip |
| 2. | BalenaEtcher | https://www.balena.io/etcher/ |
| 3. | Android Compress bin file | https://www.brobwind.com/archives/1541 |
Format the SD card
It is important to format the SD card and don’t use the default window format. First, download the SDformatter from the above link, then extract the Zip file and open it.
- Insert the memory card into the card reader and connect it to your computer. After that, open the SDFormatter, the window would appear like this.
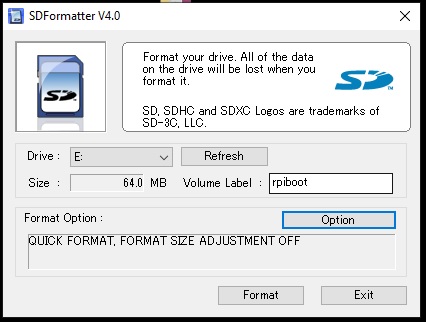
- It will automatically detect your removable device and show in the Drive option in my case it appeared in ‘E drive’ and click on the Format option. A dialog box will pop out stating “Data may be retrieved after Quick Format. Do you want to continue with Quick Format? “. Press OK to continue.

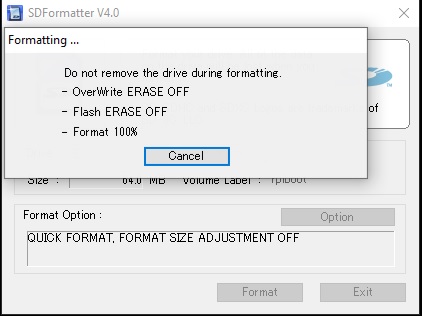
- Another dialog box will appear “Do not remove the drive during formatting. Are you sure you want to format?” Press Ok. Do not remove the device during the process, it will damage the device, otherwise.

- After following the respective steps, a processing window will appear on the screen regarding formatting. After the process is complete, then the memory card will be ready to flash (refer to the images below).

Flash or BalenaEtcher
BalenaEtcher is a Flash SD App Software that helps the computer to flash android OS in the SDcard. Download the flash SD App Software from the link mentioned above in the table of software requirements.
- Open Etcher flash SD App and click on Flash from the file.

- Navigate and select the Raspberry Pi images Android P9 and click on open.

- After uploading the file, tap on Flash. The process will take some time to get completed.

- The flash SD App Software will automatically decompress, flash, and verify it and this process will take some time. Do not remove the device during the process it may damage the SD card & Card reader.

Boot the Raspberry Pi
Your SD card with Raspberry Pi OS is ready to use. The installation is done, successfully. Now remove the SD card from the card reader and insert it on Raspberry Pi, connect the keyboard, screen, and mouse and switch on the power.
- The boot screen will show the installation of Android Raspberry Pi 3 is successful now, refer to the image below.

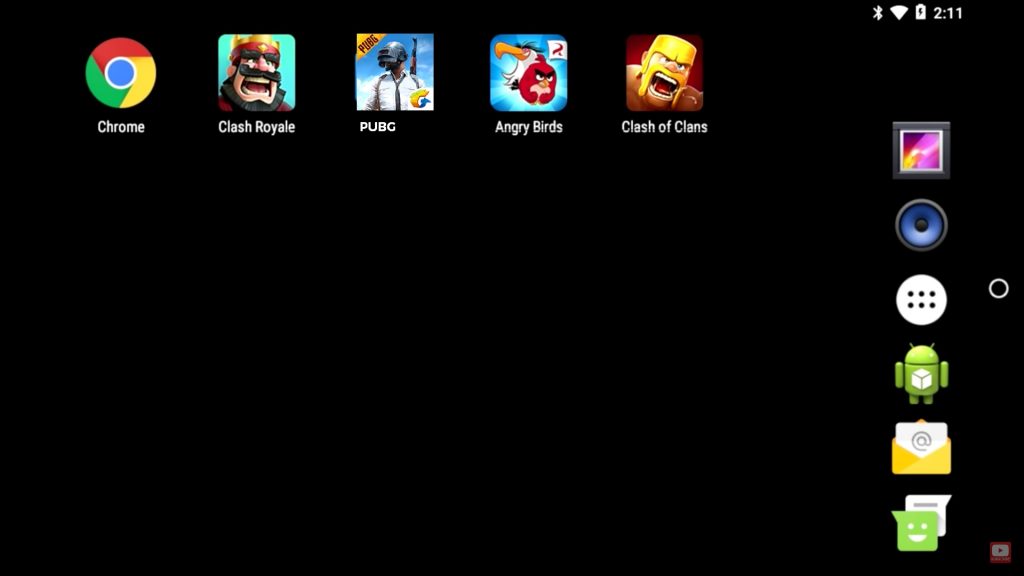
- The first screen after installing Android on Raspberry Pi will look like the image attached below.

Android on Raspberry Pi internet connection
Slide down the screen and click on the Wi-Fi icon. And, connect it with the respective internet connection.

Android on Raspberry Pi is fully set up now. Log in to the play store and download the application & mobile game of your choice and have an amazing experience of it.
Android on Raspberry Pi smart TV
It is easy to convert your normal TV into Raspberry Pi 3 Smart TV. Just connect your TV with it and your Raspberry Pi Smart TV is ready. You can have direct access to YouTube, Instagram, Facebook, etc. through the TV. The Raspberry Pi 3 is applicable to Raspberry Pi 2 and other models as well.
To work with Raspberry Pi 2 Smart TV you need a LAN connection as Pi 2 does not support Wi-Fi. You can also use an external Wi-Fi card to connect the TV to internet.