In the previous post, we have already discussed how to install the Raspbian on Raspberry Pi. and discussed the pinout of all models of the Raspberry Pi. To work with a Raspberry Pi, you need a keyboard, mouse, and monitor. Working with two computers is a bit difficult, so we will use the remote desktop Raspberry Pi for Laptop or PC. Also, we can work with our Raspberry Pi anywhere in the world. In this column, we will discuss about Raspberry Pi remote desktop.
Material
- Raspberry Pi
- Wi-fi Router
- Personal computer
- Internet connection
- Mouse (one time)
- Keyboard (one time)
- HDMI monitor (one time)
VNC
VNC (Virtual Network Computing) is a technology that enables the remote graphical desktop sharing system. In this article, we will learn how to set up Real VNC and use of Raspberry Pi remote desktop.
Enable Raspberry Pi VNC server Terminal
Real VNC is a screen sharing VNC software. In Raspbian Buster, the recommended software is pre-installed with the desktop. To check whether the real VNC is installed follow the step below:
Step 1
Power-up the Raspberry Pi and open the terminal window. Then, type the following command–
sudo raspi-congig

Step 2
Navigate to the Interfacing Options and press Enter key.

Step 3
Go to VNC and press Enter and Enable.

Enable Raspberry Pi VNC server through Graphic Interface.
You can enable a VNC remote desktop using a graphic interface. To do that follow the below-mentioned steps.
Step 1
Go to Preferences > Raspberry Pi Configuration.

Step 2
Go to Interfaces and then, enable VNC.

Install Real VNC in Raspberry Pi
If you are using any other Operating System. The above option is not visible it means your Pi doesn’t have VNC installed. In this case, you have to install the Raspbian VNC. You can download or follow the steps below.
Step 1
Open Terminal and type the following command-
sudo apt update
Step 2
When the update is done then type the following command to download and install Pi VNC.
sudo apt install realvnc-vnc-server realvnc-vnc-viewer
VNC viewer for windows
Download and install RealVNC software on your computer. This VNC free software allows your computer to communicate to a Raspberry Pi remote desktop. VNC Ubuntu, VNC iPhone, VNC android, and VNC windows are available to download. Now, download the correct file according to your platform and follow the instructions. Here, we are using VNC software for windows. VNC player windows are super easy to use, all we need is the Pi’s IP address.
Find IP address of the Raspberry Pi
To find the IP address of Raspberry Pi connect your Raspberry Pi with the same network, to which your computer is connected.
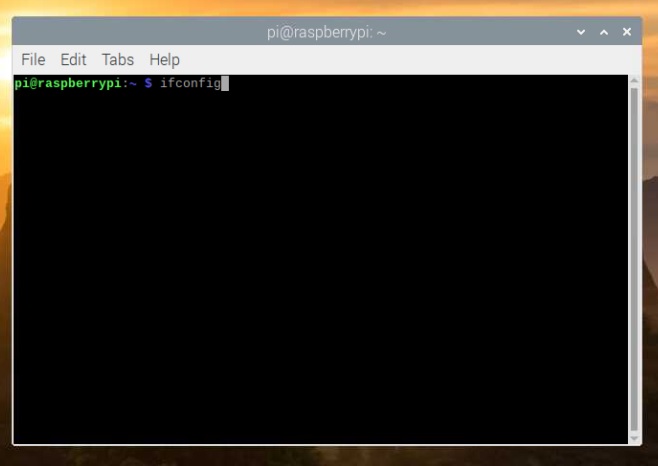
Open the Terminal window in Raspberry Pi and type the following command and press Enter.
ifconfig

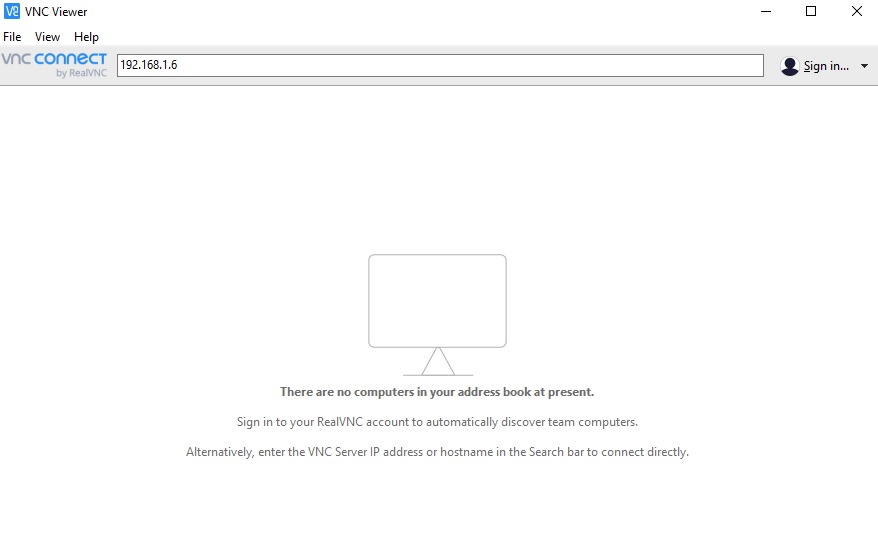
Your IP address should be in this format: 192.168.1.6 (with different values)

Setup VNC PC
Step 1
Open remote VNC on your main computer and enter the IP address of Raspberry Pi.

Step 2
The default username is pi and the default Raspberry Pi password is raspberry. Enter these credentials and press enter to continue.


The Raspberry Pi desktop is visible on your main computer. Follow the same method to connect to the VNC server from Mac.
Remote VNC for Android and iOS
You can control your VNC enabled device anywhere in the world using your smartphone. For the same, you just have to register on the VNC account and login to different devices using the same account.

After registering, opens the VNC viewer in your VNC iPhone or Android with the same credentials.

Open your mail and then, allow authenticating the device.

You will get a list of all the login devices. Choose the device you want to use. And make sure that you will sign in with the same ID.

If your device is not on the list. Open the Raspberry Pi VNC in that device and login into that device as well.
Access Raspberry Pi remote desktop from any place
To access using your computer is a bit different.
Step 1
Enter your router’s configuration menu. Then, enter the default gateway IP address into the search bar of your browser.

Step 2
Login to your router’s configuration page. After that, enter the username and password to find on your router.
Step 3
Go to advance setting, and search for Port Forwarding.
Step 4
Add a new Port Forward. Also, the abovementioned instruction varies from router to router. You can also call the customer service or search on the internet according to your type of router.
Step 5
Use the Raspberry Pi IP address ex:- 192.168.1.6. And forward the port for windows at 3389 and then, save the settings.
Step 6
Type on google “what’s my IP” and it will give you your router’s public IP.
Step 7
Open the Remote Desktop Connection application window. Fill in the required blocks from the above-mentioned steps. And, the process is complete for you to operate it..

