A ball tilt sensor is a switch that can dig out basic motion, orientation, or inclination like a relay switch. These switches are planned in such a way that plenty of level of inclination makes or breaks the electrical joint. Such a signal can either be used as an indicator or turn something ON or OFF.
They are small, low priced, very simple to use, and never worn out. Their simplicity makes them well-liked for use in toys, gadgets, robots, and other devices whose operation depends on inclination. This is why they are often called the “poor man’s accelerometer”.
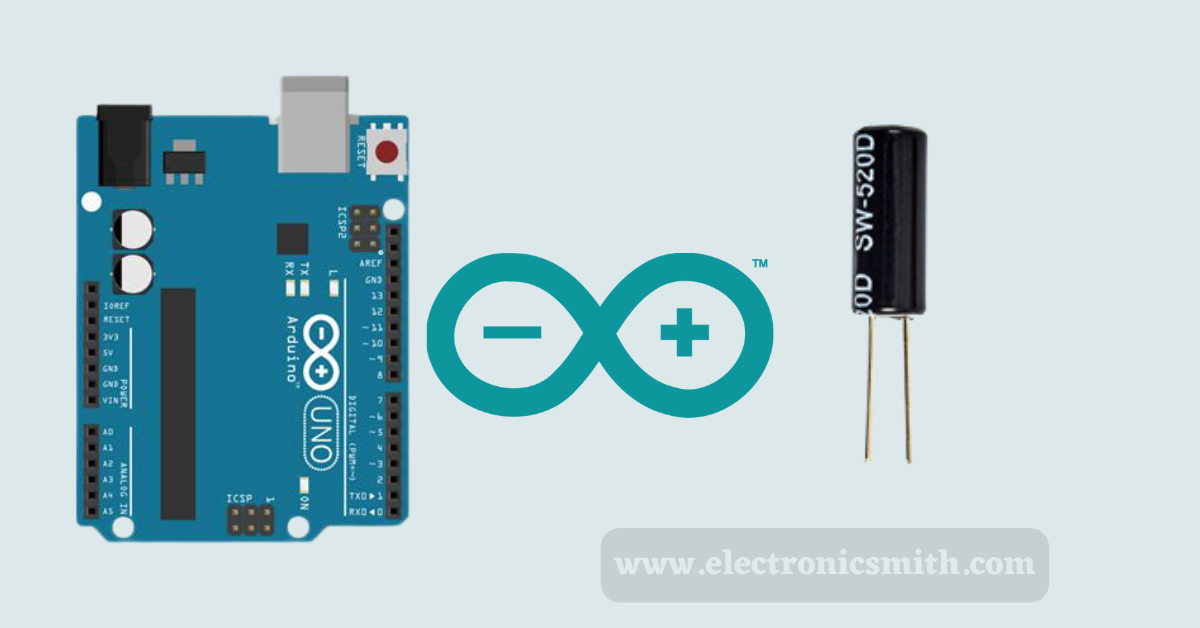
How the Ball Tilt sensor looks
While not as precise or malleable as an accelerometer, the tilt sensor can determine motion or orientation quite well. Another main advantage of a tilt sensor is that it can always be used as a standalone sensor. On the other hand, the accelerometer outputs a digital or analog voltage that must be examined with additional circuitry.
A ball tilt sensor is usually made up of a metal tube with a little metal ball that always rolls around in it. One end of the cavity Always has two conductive elements or poles. The sensor is planned so that an adequate tilt level allows the ball to roll, making or breaking an electrical link.

A ball tilt sensor is more of a switch that detects not only basic motion but also orientation or inclination. These switches are made so that an adequate level of inclination makes or breaks the electrical joint. Such a signal is most widely used as an indicator and can be used to turn something ON or OFF.
The special functionality of tilt sensors is influenced by factors such as gravity, vibration, temperature, zero offsets, linearity, cross-axis sensitivity, acceleration/deceleration, shock, and a clear line of sight between the user and the measured point.
Working of sensor
A ball tilt sensor comprises a metal tube with a minimal quantity of metal ball that rolls on all sides. One end of the cavity has two conductive elements (poles). This sensor is composed so that a sufficient tilt level always allows the ball to roll, making or breaking an electrical connection.
The ball touches the poles when the sensor is straight and makes an electrical joint. And when the sensor is tilted, the ball rolls off the poles, and the connection is detached.
Let us consider two cases:
Case 1: NOT TILTED
To begin with, when it is NOT tilted, it tends to give LOW output because the liquid mercury completes the circuit by joining the two electrodes. The LED tends to remain ON when the given output is LOW on board.
Case 2: TILTED
When it is inclined in a specific direction or an angle, the liquid mercury fails the contact connecting the metal electrodes, and the circuit opens. Hence, we get HIGH output in this condition, and the onboard LED turns off.

Material required
| S. No. | Components used | Unit used |
| 1 | Mercury switch/tilt sensor | 1 |
| 2 | Arduino UNO | 1 |
| 4 | LED | 1 |
| 5 | Resistor – 220 ohm | 1 |
| 6 | Breadboard | 1 |
| 7 | Connecting wires | As per requirements |
Circuit connection
To attach a Tilt sensor with the Arduino, it needs a 5v dc input to operate. That 5v is provided using Arduino UNO, and the Tilt sensor output will be taken at PIN 2 of the Arduino. If you attach the sensor this way you will automatically need to start the Arduino built in pull up resistor for the input pin. Apart from that you must have to use an external 10k resistor in your circuit.
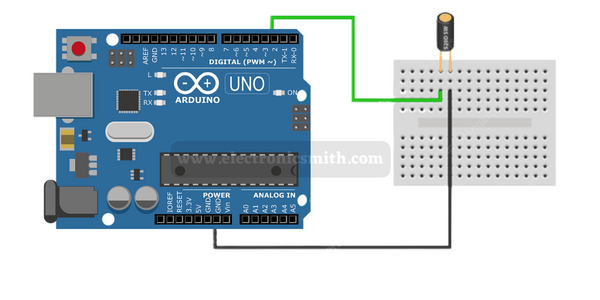
You must operate the Arduino’s ‘built-in’ pull-up resistor for the input pin to attach the sensor. In other ways, you must use an external 10K pull-up resistor in your circuit.
Code
const int tiltPin = 2;		// tilt sensor pin is connected to pin 2
const int ledPin = 13;		// built-in LED is connected to pin 13

void setup() {
	pinMode(tiltPin, INPUT);		// set sensor pin as an INPUT pin
	digitalWrite(tiltPin, HIGH);	// turn on the built in pull-up resistor
	pinMode(ledPin, OUTPUT);		// set LED pin as an OUTPUT pin
}

void loop() {
	if (digitalRead(tiltPin)) { // check if the pin is high
		digitalWrite(ledPin, HIGH);	// turn on the LED
	}
	else { // if it isn't
		digitalWrite(ledPin, LOW);	// do the opposite
	}
}
The code is quite self-explanatory. Initially, two constants are defined, which declare the Arduino pins to which the tilt sensor and built-in LED are connected. The sensor pin is configured as an input in the setup, while the LED pin is configured as an output. Also, the internal pull-up is enabled for the sensor pin. In the loop, the built-in LED is turned ON if the sensor pin is HIGH, otherwise turned OFF.
const int tiltPin = 2;		// tilt sensor pin is connected to pin 2
const int ledPin = 13;		// built-in LED is connected to pin 13

int ledState = HIGH;		// the current state of the LED
int tiltState;				// the current reading from the sensor
int lastTiltState = LOW;	// the previous reading from the sensor

unsigned long time = 0;		// the last time the output pin was toggled
unsigned long debounceDelay = 50;	// the debounce time, increase if the output flickers

void setup() {
	pinMode(tiltPin, INPUT);		// Set sensor pin as an INPUT pin
	digitalWrite(tiltPin, HIGH);	// turn on the built in pull-up resistor
	pinMode(ledPin, OUTPUT);		// Set LED pin as an OUTPUT pin
}

void loop() {
	// read the state of the tilt sensor
	tiltState = digitalRead(tiltPin);

	// If the sensor really tilted?
	if (tiltState != lastTiltState) {
		// reset the debouncing timer
		time = millis();
	}

	if ((millis() - time) > debounceDelay) {
		// whatever the switch is at, its been there for a long time
		// so lets settle on it!
		ledState = tiltState;
	}
	digitalWrite(ledPin, ledState);

	// Save the last tiltState so we keep a running tally
	lastTiltState = tiltState;
}
FAQs
What is a tilt switch, Arduino?
Ans- Tilt sensors are of a meager cost and are easy to use. They are also sometimes known as tilt or ball switches. They can find Whether an object is upright or tilted at a certain angle. To attach it to an Arduino board, you need to add one 10Kohm resistor. The tilt sensor never has a fixed positive or negative side.
How accurate is a tilt sensor?
Ans- The tilt sensors can always choose carefully from arc seconds to 180° with a very high accuracy of 0.0003o. We offer MEMS-based inclinometers, electrolytic tilt sensors, and tilt switches for utilization in many applications, from laser levels to seismic monitoring to many other medical devices.
What does a tilt ball switch detect?
Ans- A ball tilt sensor is more of a switch that can always be used to find basic motion, orientation, or inclination. These switches are usually manufactured so that a sufficient level of inclination makes or breaks the electrical connection.
When would you use a tilt switch?
Ans- Tilt switches are normally used for a wide range of applications, such as signaling of positions of valves, maximum tilt protection (e.g., of aerial platforms or platforms), and replacing mercury exchangers for tilt protection.
What is the purpose of the balls inside the sensor?
Ans- It holds a metallic ball inside it that would commute the other two pins of the device from on to off and vice-versa.