DietPi is one of the best and lightest Debian-based operating systems available. It the highly optimized for very minimal CPU and memory. This means that it will take very low RAM and CPU resources while being operated. That’s why this operating system always runs on its maximum potential. In this post, we are going to learn how we can install DietPi on Raspberry Pi.
Why DietPi is the best lightweight OS: –
DietPi is the best lightweight operating system and below I have mentioned some of its features that make it so lightweight and more powerful.
- Well Optimised: – It is massively optimized for minimum resource uses such as minimal CPU and RAM uses to ensure your best performance.
- Simple Interface: – Its user interface has been kept simple so that it does not occupy any resources.
- DietPi-Config: – It comes with DietPi-Config which consists of all the hardware and software-based settings of this operating system which you can toggle according to your needs.
It also has many other features such as DietPi-Services Control, DietPi-Update System, DietPi-Automation, etc. If you want to read about all the features of this operating system then you can go to its official website and read about it.
Installing DietPi on Raspberry Pi: –
Now let’s get started with the main topic of this post which is how we can install DeitPi on Raspberry Pi. First of all, you will need a DietPi image file. So go to this link and search for the Raspberry Pi option. After you’ve found the Raspberry Pi option click on it and there you will see several download links. There will be a download link for “ARMv6 32-bit Images“. Simply download that image file. We are using this image file because it can run on every Raspberry Pi system.

After downloading this file you will get a .7z zip archive. Now it’s time to extract this file. In Windows, you can simply download software like Win-Rar for 7zip that will do this task for you. Once you have installed suitable software simply right-click on the file that you have downloaded and click on the “extract here” button. Which will give you an “image file” with the extension of .img which we are going to flash into a micro SD card.

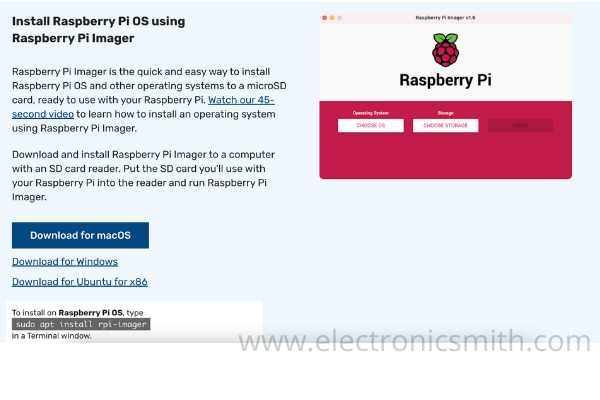
Now go to this link and download “Raspberry Pi images software“. We will use this software to convert Micro SD cards into a bootable media.

- Now we have done with all our downloading parts we have downloaded all the software that is required. It’s time to flash our Micro SD card and convert it into a bootable media that we will later use with our raspberry pi.
- Open restful verify images software and select the image file that we have extracted from the file that we downloaded earlier. After selecting the file simply select your SD card. Once you have selected both the things you can click on the Write button and it will start installing the operating system on the micro SD card.
- Downloading and installation path has been completed. Now you have to simply insert your Micro SD card into your Raspberry Pi. After inserting a Micro SD card into Raspberry Pi, boot it up. You will be guided through the installation Wizard that will help you to install DeitPi OS correctly.

Frequently Asked Questions: –
Q: - Can I install DietPi on any Raspberry Pi board?
A: - Yes, you can install DietPi on any raspberry board. You just need to download the image file that we have addressed in this post. Make sure to download only that image file because it is the only file that is supported by every Raspberry Pi board.
Q: - Is DietPi free?
A: - Yes, it is an open-source software or you can say it is an open-source operating system and open-source software is always free. You can even modify this operating system according to you if you want.
