
Introduction
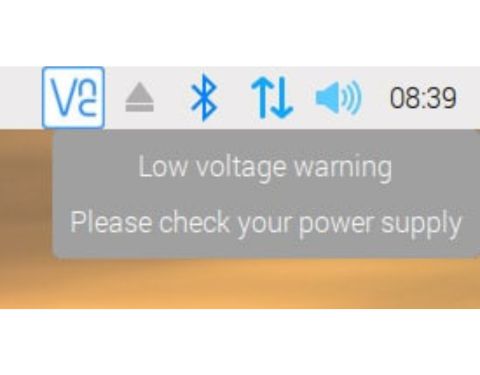
For enthusiasts and professionals working with Raspberry Pi, encountering the “Raspberry Pi Undervoltage Detected” warning can be a frustrating obstacle. Fortunately, there is a way to address this common issue effectively.
This blog post dives into the nuances of Raspberry Pi Undervoltage warnings, the repercussions of overlooking such alerts. Moreover, it explores DIY remedies and the importance of choosing the appropriate power supply and cables to prevent Undervoltage issues.
Let us now have a look at what an undervoltage warning actually is.
What is Raspberry Pi, Undervoltage Warning?
The “Raspberry Pi Undervoltage Detected” alert serves as a critical notification for users, indicating that the device’s power input has fallen below its operational threshold, typically under 4.65 volts for models like the Raspberry Pi 3 B+. This condition most commonly occurs due to using power supplies or cables that are not up to the bar and ultimately fails to deliver the necessary voltage when the device is under load.
Recognizing this alert is essential as it points to the device operating in a state that is not ideal, which could lead to a variety of performance issues or even physical damage if not addressed. The Raspberry Pi relies on consistent and sufficient power to function correctly, any deviation from this can cause instability in its performance and affect the longevity of the device.
The Undervoltage warning is not just a simple notification but a signal of potential underlying problems with the power supply chain to the device, notifying the users to investigate and rectify the situation to maintain optimal operation and prevent possible unfavorable outcomes.
Let us now have a look at how to detect the undervoltage in Raspberry Pi devices.
How To Detect Undervoltage In Raspberry Pi Devices?
To detect or find the Undervoltage issue in your Raspberry Pi device all you have to do is to follow the methods mentioned below:
- vcgenmcd Command
The first and most easiest way to detect the under-voltage is by using the vcgenmcd command in the terminal. Using this command, you can retrieve various information from the hardware itself. One of these things is the status of the CPU/GPU.
To check whether your Raspberry Pi is throttled or not you have to use the following command:
vcgencmd get_throttled
If your Raspberry Pi is experiencing throttling due to Undervoltage, you will see the following message:
throttled=0x50005
For your better understanding we have added the table of different values and their meanings:
| Bit | Hex Value | Meaning |
| 0 | 1 | Under-voltage detected |
| 1 | 2 | ARM frequency has been caped |
| 2 | 4 | Currently throttled |
| 3 | 8 | Soft temperature limit is active |
| 16 | 1000 | Undervoltage has occurred |
| 17 | 2000 | ARM frequency capping has occurred |
| 18 | 4000 | Throttling has occurred |
| 19 | 8000 | The soft temperature limit is active |
- By checking the kernel message buffer
Another way to detect the undervoltage is by checking the kernel message buffer. For this purpose, you have to use the dmesg command. This command will return the content of the kernel message.
dmesg
The kernel message will be long and you have to scroll down until you find the following message:
Under-voltage detected!
If this message appears in the kernel message then your device is experiencing undervoltage.
That is all in the methods to detect the undervoltage. Let us now have a look at the consequences of ignoring Undervoltage:
The Consequences of Ignoring Undervoltage Warning
Ignoring the signals of Undervoltage warnings from your Raspberry Pi is not just an oversight, it can have lasting effects on your device and projects. Initially, you might notice diminished performance or unexpected system behaviors, such as freezing or rebooting during operation.
These are early indicators that your device is struggling to maintain adequate power, which can significantly affect the progress of your projects or experiments. Further, consistent exposure to undervoltage conditions puts additional stress on the Raspberry Pi’s components.
This undue stress can cause wear and tear of the device and ultimately lead to a shortened lifespan of the device. For projects that depend on long-term reliability, this is a critical concern as undervoltage will reduce the device’s working capabilities which ultimately affects the quality of the project.
Another risk of undervoltage exposure is data integrity as it can lead to improper data writing and retrieval processes which will cause data corruption. This data corruption could mean the loss of crucial project data, hours of work, or even the integrity of the software running on the Raspberry Pi.
In scenarios where the Raspberry Pi controls or monitors sensitive operations, the chances of data corruption or system failure will cause inconvenience and ultimately lead to more serious system failures or operational failures. That is all in the consequences of ignoring Raspberry Pi’s undervoltage warning.
Let us now have a look at some of the DIY solutions to this issue:
DIY Solutions for Raspberry Pi Undervoltage Detected
There is no need for you to spend money on costly equipment for undervoltage issues on your Raspberry Pi. If you are the hands-on DIY-do-it-yourself kind of person and you have the necessary tools and materials in your hand, you are already halfway to solving the problem. First of all, the power supply must be sturdy enough to take care of the Raspberry Pi’s needs which in this case must be at least 2.5A. This simple inspection is more than capable of improving the system stability noticeably.
Equally crucial is the choice of USB cables. The quality of these cables plays an important role in maintaining the voltage from your power source to the Raspberry Pi. The more thick and short a USB cable is the more voltage it will carry and the less voltage drop will occur so ensure to opt for thick and short USB cables.
To solve the issue of Raspberry Pi Undervoltage, the selection of an appropriate power supply and cables is very important. A specialized power supply which is designed for the Raspberry Pi or original power supply is the one that meets the recommended output of 5V and 2.5A, is essential for maintaining stable operation, and prevents Undervoltage warnings.
Similarly to overcome the issue of the undervoltage you can also design your own power supply using the excellent services of PCBWay. PCBWay offers their users to design their own electrical components according to their needs. This feature of PCBWay is more than just a customization as you can make components in your desired form.
Designing the power supply will reduce the chances of undervoltage to much extent. For creating your own power supply you just have to visit the official pcbway and then tap on download to download the Gerber file. Once you download the Gerber file of the power supply, all you have to do now is to order the PCB.
Implementing these DIY fixes not only addresses the immediate Undervoltage alerts but also enhances the overall power delivery system of your Raspberry Pi setup. With these adjustments, enthusiasts can expect a noticeable improvement in their device’s performance and reliability, keeping undervoltage warnings at bay.
That is all in the DIY(Do It Yourself) solutions for the Raspberry Pi Undervoltage warning.
Conclusion
The Raspberry Pi undervoltage warning is pretty common but can cause a significant effect on the device and project. Fixing the Undervoltage warning requires a clear and deep understanding of the root cause and similarly the corrective action. Still with the solutions offered by PCBWay and DIY strategies provided in this article, users are well-equipped to tackle this challenge head-on.
However, these warnings are not issues but are opportunities to enhance the overall efficiency and reliability of your Raspberry Pi projects. By focusing on the implementation of high-quality power supplies and cables specifically designed to meet the device’s requirements, you can significantly reduce the risks of undervoltage.
This safety measure not only safeguards your device from performance issues and potential damage but also secures the integrity and success of your projects. Implementing these strategies empowers Raspberry Pi enthusiasts to achieve optimal device operation, ensuring a smooth and uninterrupted experience.
If you still have any confusion left then there is no need to worry as we have added some frequently asked questions below:
Frequently Asked Questions
Will under-voltage issue damage my Raspberry pi?
While occasional under-voltage warnings may not immediately damage your Raspberry Pi, prolonged exposure to inadequate power can lead to instability, data corruption, or even hardware damage over time.
Is it possible to turn off the undervoltage warning on the Raspberry Pi, and should I?
Technically, it might be possible to suppress these warnings, but doing so is strongly discouraged. These warnings are crucial for indicating insufficient power supply conditions. Addressing the root cause by enhancing your power setup is a more effective approach than ignoring the device’s attempt to signal a problem.
Does overclocking contribute to under-voltage warnings?
Overclocking can increase power consumption, and potentially contribute towards under voltage issues. If you’re overclocking your Raspberry Pi, ensure you have a robust power supply capable of handling the increased power demands